I could be wrong, but I'm pretty sure that this is because they want to see me finish R2.
So, I obligingly took yesterday off to work on getting the dome motor installed. One of those jobs I;ve been putting off for a while now!
I've been scratching my head on this one for a while. The lazy susan I have is from ebay, and fits nice and snug in the dome. Because of this I had planned to mount the dome to the outer bearing and then use the inner bearing to attach to the body. The problem with this is how do you attach the motor to the outer bearing?
Most people will use the Rockler bearing, and use the inner bearing to attach to the dome with a Delrin ring.
I decided finally to I would have to do something similar.
So first up - mounting the motor! I'm using a Jaycar motor, the same as the ones in the feet.
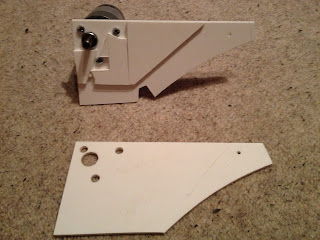
This is the design idea I came up with.
And here's something completely different :)
I had a couple of off cuts that did the job so I improvised :)
The idea is that being styrene, it has a bit of flex. To reduce this I've layered up three pieces of 3mm. The middle layer is a spacer, so that the top of the frame slots into the gap between the top and bottom layer. The bottom layer also has a cut out to accommodate the uprights in the frame. The holes in the top layer are also bigger so that I can still access the screws.
As you can see on the right, there is a spring to pull it tight against the bearing. Having the spring will allow enough pressure against the bearing without wearing out the wheel too much.
Next up, I had to make the new base plate for the dome. After a bit of tweaking with the router to get as close of a size as the bearing (as I know this fits perfectly) I was good to go.
I want his to be light as possible, while still having a central piece for the slip ring wires to attach to
Even Mike "The Carpenter" Senna would be proud ;)
It's a great fit! It holds in place very firmly and won't need to be fixed. The hole is a great size to get the slip ring connector to pass through.
So all mounted and ready to go. Do you think it worked?


Nice update dude. Look forward to seeing it under control soon.
ReplyDeleteCheers :) Shouldn't be long now! Looking forward to seeing him drive again too now those shoulder are fixed
ReplyDeleteThis comment has been removed by the author.
ReplyDeleteNo, we just wanted some peace in the office and a break from Star Wars for 5 minutes ;)
ReplyDelete