So here's a nice big update for you :)
I finished my side vents :) Nice and simple, just used some 1mm styrene for oadding, wrapped in some of my favorite aluminium tape, and we're away. I used some perforated aluminium underneath it (attached inside the body) so the sounds doesn't get muffled.
My aluminium logic surrounds arrived! I've not mounted the lighting kit to it and it's ready to fit in the dome. Just need the dome to be ready to fit them ;)
I made the first of my coin returns!
This is made of the front piece of the aluminium skin and the various thicknesses of styrene, again covered in the life saving aluminium tape.
So a quick test fit with the current parts
I've also received my center vents. These were pretty simple to assemble, but required a bit of filing. Especially the bottom one! As a nice cheat, I drew around the inside of the tube onto a piece of paper. I then used this as a template stuck on top of the assembled internals and test fit as I was getting close to the line. Ended up with a pretty nice finish :)
After lending out a few of my motors, I finally got to test fit them again with all the nice new additions :)
Looking awesome, but a bit thin on the arms, I set about attaching the horseshoes with Brad, and we came up with a good method for attaching these. The current method of using key holes in the leg, with screws in the horseshoes is A) a bit of a fiddle to get accurate. B) A bit of a fiddle to get a nice tight fit, and C) Rattles around a lot. Being plastic it wouldn't be so bad, but it's time for a revolution!
First off, using line of site, one of the shoulder buttons, and a M3 drill bit, we marked where the holes should be drilled.
Next up, I bolted my horseshoe back to back with Brads to get the hole for the top of the shoulder hydraulic. (no pic, sorry!)
Next part was a bit more tricky. Getting the M4 bolts through the holes in the legs. Long nose pliers were a big help!
After that, it was a simple case of using some nuts to secure them :) The nuts will be replaced with the details which will be tapped to M4
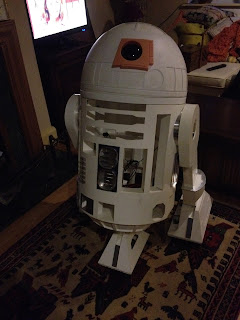
And here he is :)
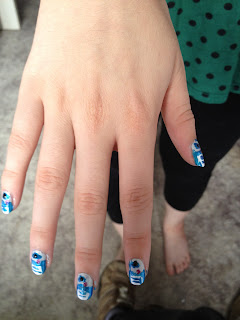
Emma was so psyched, she had to paint her nails!
And here's a little video of the ends of my ankle cylinders being lathed. When I started building this droid I never thought I'd find myself doing something like this. Very pleased I've had the chance to though :)


Build is coming along nicely mate!! Octagon port lights, nice.
ReplyDeleteThanks very much! I'm happy enough with it :)
ReplyDeleteThe light is a fluke ;) It's from the amp, which was in a good spot at the time the picture was taken. Still... could be worth doing as a long time thing :)
Yeah, the light looks good. Am thinking of having some showing through my vents :)
ReplyDeleteLike the idea with the washer - just used it to cut the inner panels on my skins.
ReplyDeleteLittle question how are you going to screw the shoulder hydraulic on as it won't turn like the shoulder buttons?
Looking very good though, mate